Using Token2 programmable tokens with the Google Credential Provider for Windows
 Google Credential Provider for Windows® (GCPW) lets users sign in to Windows® devices with the Google Account they use for work.
GCPW provides users with a single sign-on experience for Google services and all the security features available with their Google Account.
Google Credential Provider for Windows® (GCPW) lets users sign in to Windows® devices with the Google Account they use for work.
GCPW provides users with a single sign-on experience for Google services and all the security features available with their Google Account.Google allows using Token2 programmable tokens for two-step verification in Windows login (as a replacement for the authenticator application).
Requirements:
• A Google Workspace activated plan• A Google Workspace administrator account with access to the Google Workspace Admin Console
• An admin access to a Windows PC
• Windows 10 Pro, Pro for Workstations, Enterprise, or Education, version 1803 or later
• Chrome Browser 81 or later
• Any of the Token2 TOTP programmable tokens
• An app for provisioning the programmable tokens (NFC burner or USB Config tool, depending on the model). The list of compatible apps is available here.
Enable 2FA authentication
1) Login to the Google Workspace admin panel (admin.google.com) with admin rights.2) Go to Security / Authentication / 2-step verification and enable the option Allow users to turn on 2-Step Verification.

Please note that if the Enforcement option is on users will not be able to login to their Google accounts. You will have a situation like the one below.

In order to avoid such a situation, you need the user to have an enrolled authenticator app (or hardware token) before turning on this option. Or make manipulations with OUs; turn on 2FA for a specific OU and move the user there after 2FA activating.
Step 1. Enable the 2FA method
1. Open your Google account.2. In the navigation panel, select Security.
3. Under “Signing in to Google,” select 2-Step Verification and then Get started.
4. Enter your phone number and select a method to get codes > click “Next”.

5. You receive an SMS on your phone with a code. This is a requirement of Google, the phone number will be used to restore access in case access to the authenticator app (or hardware token) is lost or the profile is corrupted. Enter the verification code to confirm that it worked, and click “Next”.
6. After 2-Step verification is turned on, you can add the "Authenticator app" method.

7. Click the "Set up authenticator" button.

8. A QR code will be displayed in the browser that you will scan using one of the provisioning tools in the next step.

Step 2. Provision the token
- Launch the NFC burner app on your Android device and hit the "QR" button
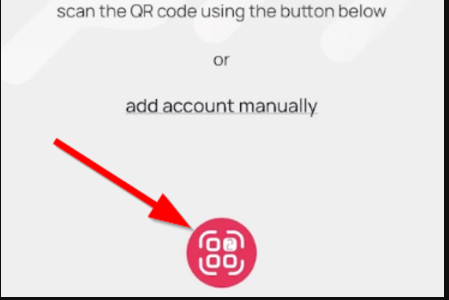
- Point the camera to the QR code shown on the account page. Upon a successful QR scan, the camera window should disappear
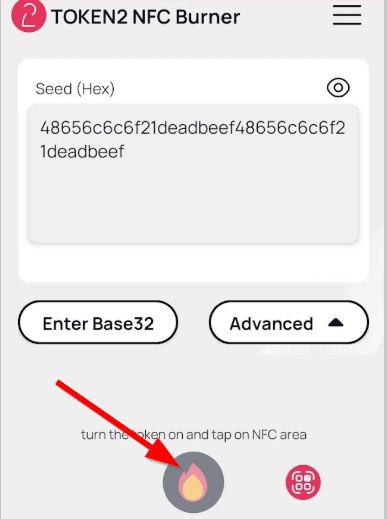
- Turn on the token and touch it with your phone (make sure it is overlapped by the NFC antenna) and click "Connect" on the app
- Upon successful connection, click the "Burn seed" button (the button will become active only if NFC link is established).
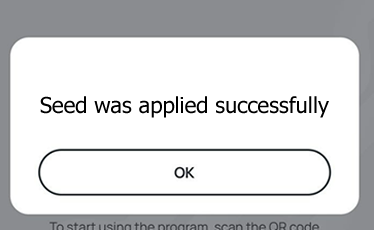
- A message box similar to the one below will be shown upon successful completion
Follow the steps below to perform setting the seed for your token using Windows App.
1. Launch the exe file, then select the NFC device from the drop-down list and click on "Connect". You should see a message box notifying about a successful operation.
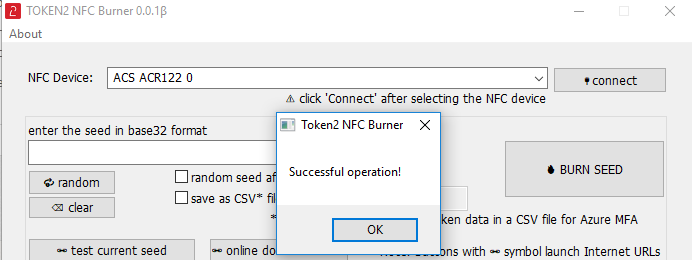
2. Enter or paste the seed in base32 format, or use one of the QR scanning methods to populate this field
3. Place the token onto the NFC module and wait for its serial number to appear.
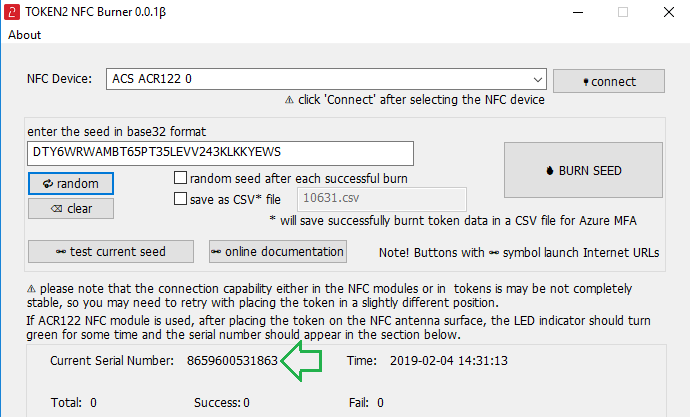
4. Click on "Burn seed" button. A log entry with the serial number and "Successful operation" text will be logged in the log window.

- Launch the NFC burner app on your iPhone device and hit the "scan QR" button

- Point the camera to the QR code shown on the account page. Upon a successful QR scan, the camera window should disappear and the seed field will be populated with the hex value of the seed. Touch the Burn button to continue.

- When an NFC prompt similar to the one below is shown, turn on the token and touch the top of your iPhone with the token.
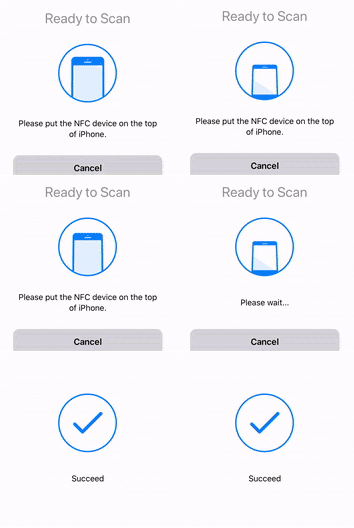
- A message box similar to the one below will be shown upon successful completion

Please note that the procedures above are shown only as examples and are valid to single profile TOTP tokens only. The procedure for multi-profile and USB-programmable devices are similar but slightly different
Step 3. Verify the OTP
After the token provisioning is done, turn the token off and back on. Enter the OTP provided by the hardware token and click 'Verify'. Now you have successfully enabled the Token2 programmable token to protect your account and use it for GCPW.
Setup Google Credential Provider for Windows(GCPW)
1) Login to the Google Workspace admin panel(admin.google.com).2) Navigate to Devices / Mobile & endpoints / Settings / Windows. In the right panel, click on Google Credential Provider for Windows(GCPW)setup

3) Then click on 'Permitted domains' and enter the domain(s) allowed to sign in through GCPW.

4) Click on 'Download GCPW' to download the latest client package to install on a Windows device.

5) Install the downloaded package and restart the PC.
Login with Google credentials
After the restart,you should see the Google Workspace login screen, which will allow you to access your Google Workspace account for login.
Enter your Google login and click "Next".

Enter the password and click "Next".

Enter the OTP from your hardware token and click "Next".

Click "I agree".

After logging in to Windows, you can access Google services without authentication.
Subscribe to our mailing list
Want to keep up-to-date with the latest Token2 news, projects and events? Join our mailing list!
