Using Token2 Hardware tokens for Barclaycard ePDQ (the Back Office ) accounts

In this guide, we explain to you how to use Token2 programmable hardware tokens to secure your ePDQ account, which we sometimes refer to as the Back Office.
Requirements:
• An ePDQ account (we used a test account for producing this guide, but the steps are the same for production accounts as well)
• A Token2 programmable hardware token. The time drift does not seem to be tolerated, so we recommend using programmable tokens with unrestricted time sync
• For NFC-programmable tokens, a device equipped with NFC and running one of our NFC Burner apps (for USB-programmable tokens, no additional hardware is needed)
Steps
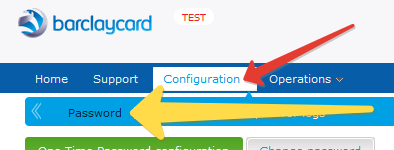
Log in to your ePDQ account and navigate to Configuration → Password
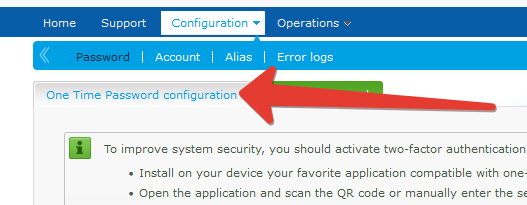
Choose the One-Time Password configuration tab
This page will show you a QR code that you should transfer over to a Token2 programmable hardware tokens using an NFC Burner or USB Config app.
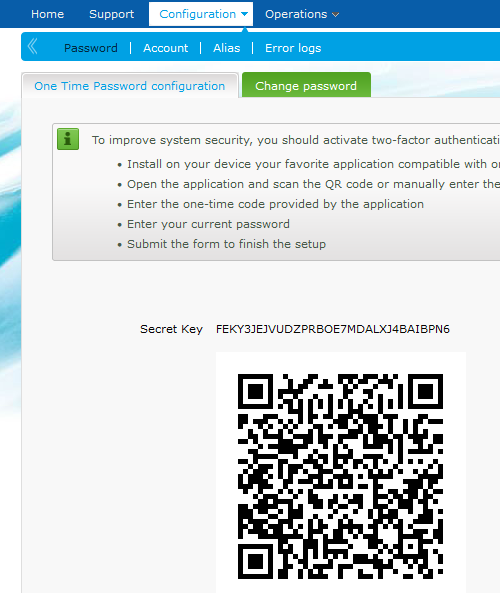
The procedures for provisioning hardware tokens are shown below.
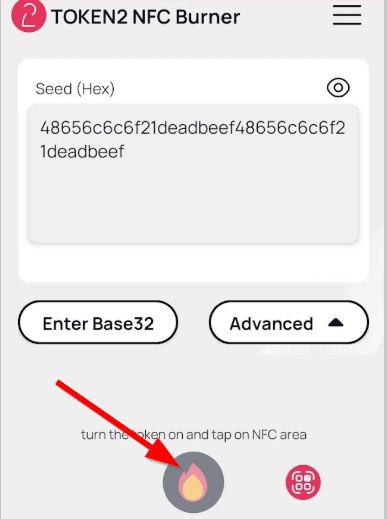
- Launch the NFC burner app on your Android device and hit the "QR" button
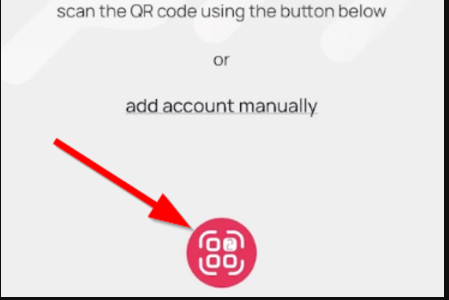
- Point the camera to the QR code shown on the account page. Upon a successful QR scan, the camera window should disappear
- Turn on the token and touch it with your phone (make sure it is overlapped by the NFC antenna) and click "Connect" on the app
- Upon successful connection, click the "Burn seed" button (the button will become active only if NFC link is established).
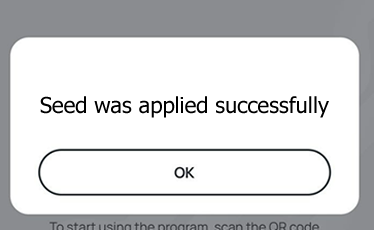
- A message box similar to the one below will be shown upon successful completion
Follow the steps below to perform setting the seed for your token using Windows App.
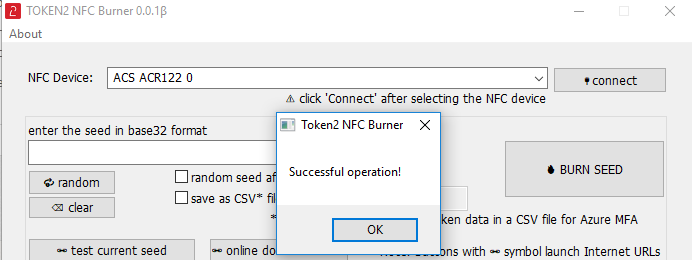
1. Launch the exe file, then select the NFC device from the drop-down list and click on "Connect". You should see a message box notifying about a successful operation.
2. Enter or paste the seed in base32 format, or use one of the QR scanning methods to populate this field
3. Place the token onto the NFC module and wait for its serial number to appear.
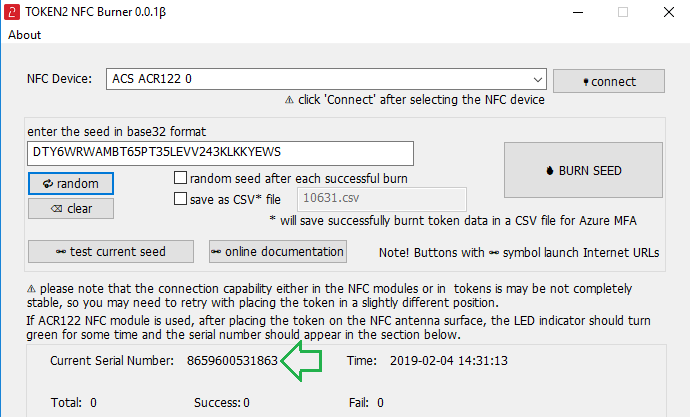
4. Click on "Burn seed" button. A log entry with the serial number and "Successful operation" text will be logged in the log window.

- Launch the NFC burner app on your iPhone device and hit the "scan QR" button

- Point the camera to the QR code shown on the account page. Upon a successful QR scan, the camera window should disappear and the seed field will be populated with the hex value of the seed. Touch the Burn button to continue.

- When an NFC prompt similar to the one below is shown, turn on the token and touch the top of your iPhone with the token.
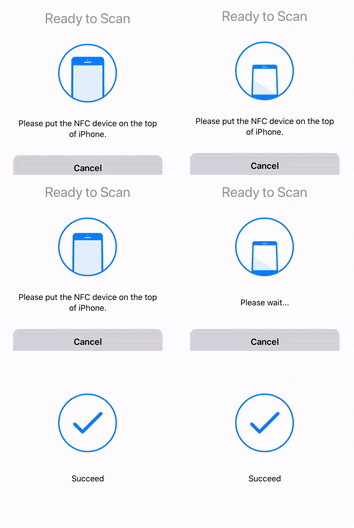
- A message box similar to the one below will be shown upon successful completion

Once the burning/configuration process has been completed, turn the hardware token off then on again to generate a new OTP. Then, enter the OTP generated by the token in the first field, then your ePDQ password in the second field and click Submit.
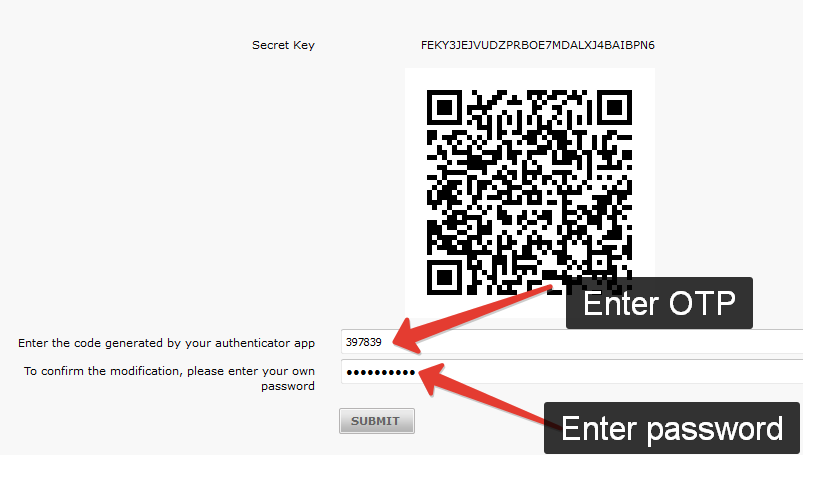
If the password and the OTP are validated, you will see a message like below:
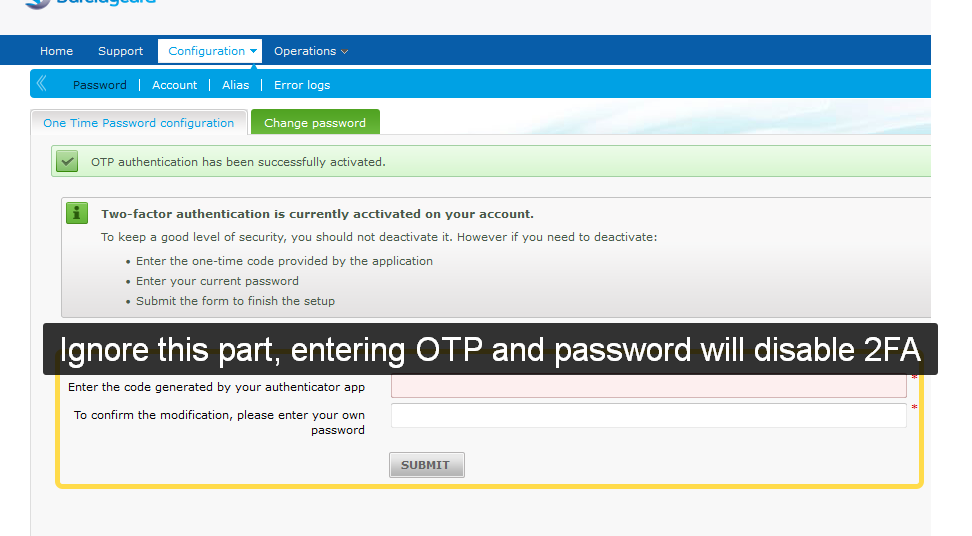
The success message window will also show a form to disable two-factor authentication. This has to be ignored - do not submit this data if you want to keep your 2FA active: submitting OTP and password on this stage will disable your two-factor authentication!
Important! ePDQ system does not tolerate time drift, so your token's system clock will need to be adjusted using the config apps. We expect this will be needed to be done around once a year.
Subscribe to our mailing list
Want to keep up-to-date with the latest Token2 news, projects and events? Join our mailing list!
